Once you’ve connected your ConvertKit account to ConvertBox, you can then use our conditional rules to target website visitors based on ConvertKit attributes such as lists and tags.
This powerful functionality allows you to show personalized, highly targeted messages and CTA’s based on where visitors are in your overall sales journey.
How to target visitors in ConvertKit
First, if you have not done so already you will need to connect your ConvertKit account.
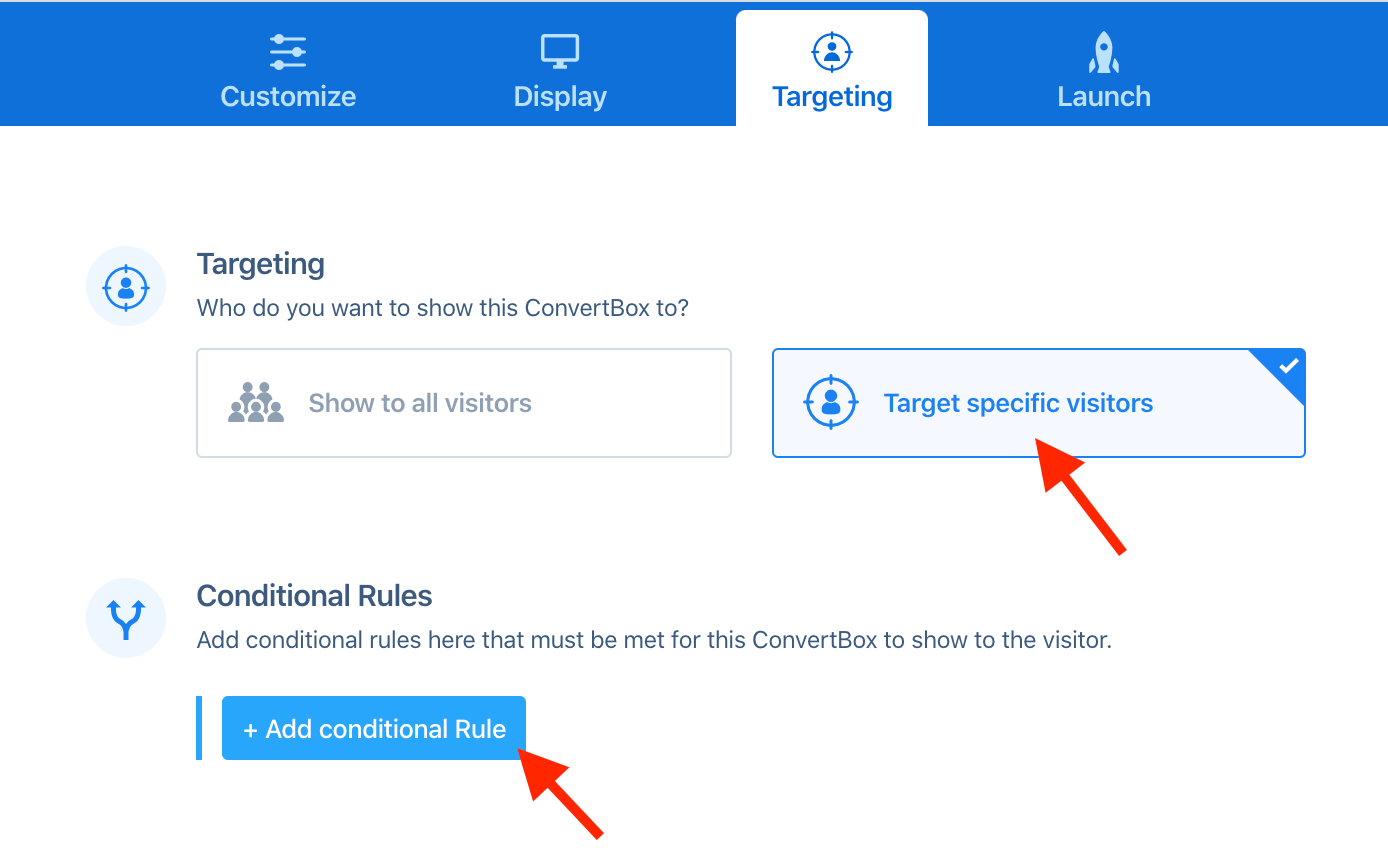
Once you have connected your ConvertKit account edit the ConvertBox you want to set targeting form (or create a new one) and go to the Targeting tab.
Select the option Target specific visitors, this will reveal an additional option below to set conditional rules that must be met for your ConvertBox to show.

Select Add conditional rule to add a single rule or series of conditional rules that must be met for the ConvertBox to show.

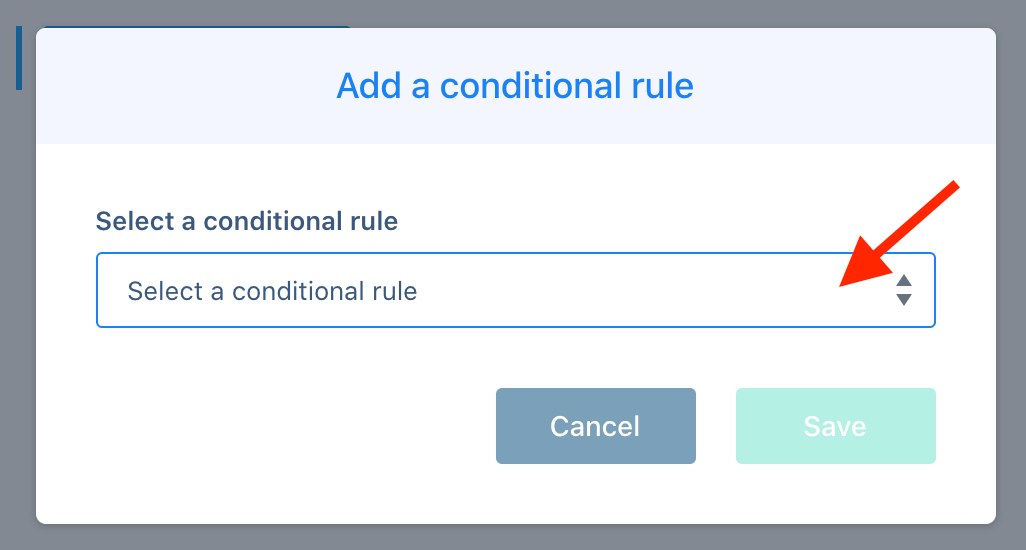
In the conditional rules modal you will see the following targeting rules for ConvertKit.
- Has ConvertKit tag
- Does NOT have ConvertKit tag
These rules can also be combined with other conditions using the AND / OR logic.
How ConvertBox identifies website visitors in ConvertKit
Before ConvertBox can identify visitors on your site they must take one of the following actions…
1. The visitor submits a ConvertBox form on your site containing an email field.
– OR-
2. The visitor visits your website with their ConvertKit ID passed through in the URL using the supported targeting parameter. By adding this parameter to all email links to your site the visitor will be sync and tracked regardless of which device they use.
To target new ConvertKit contacts who submitted your ConvertBox form no further action is needed, this will happen automatically.
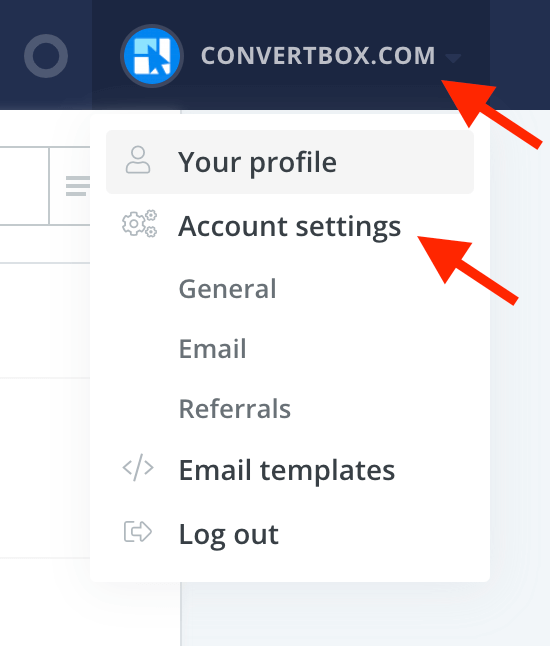
To target existing ConvertKit contacts you will need to activate an advanced setting in your ConvertKit account. To do this sign into your ConvertKit account and go to “profile”, then select “Account settings” from the drop-down.

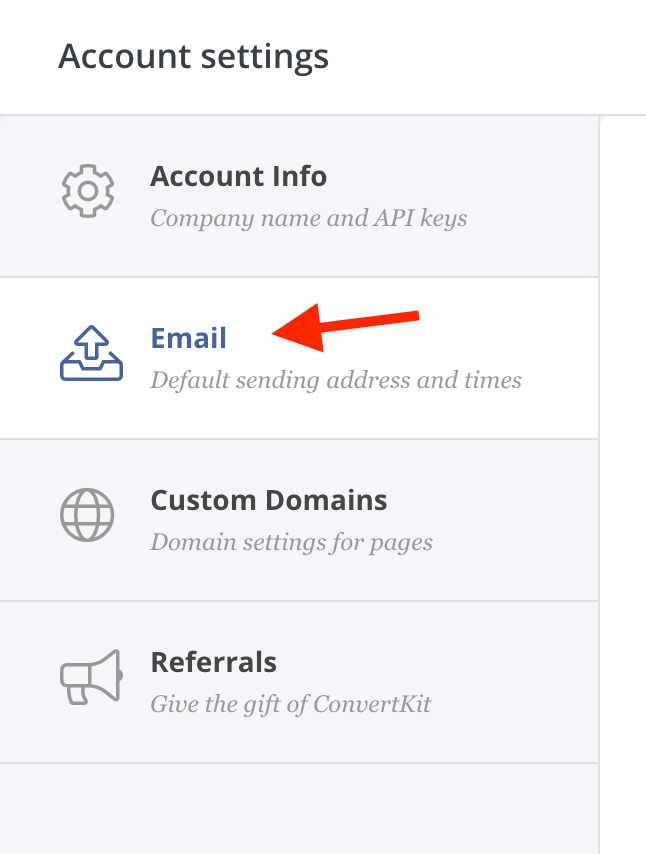
Select “Email” settings.

Then at the bottom of the page under the Advanced heading, tick the box called “Add subscriber_id parameter in email links“.

Once this option is selected when the visitor clicks the email link going to your site, the ID of the contact will be passed through so ConvertBox can identify the visitor and begin targeting them based on their ConvertKit data set in your targeting rules.
From that point on whenever the visitor returns to your site using the same device, ConvertBox will be able to identify the visitor.
