ConvertBox forms are very flexible and can be used alone to collect visitors information on a single step or to collect information across multiple steps in your ConvertBox.
Linking multiple forms together
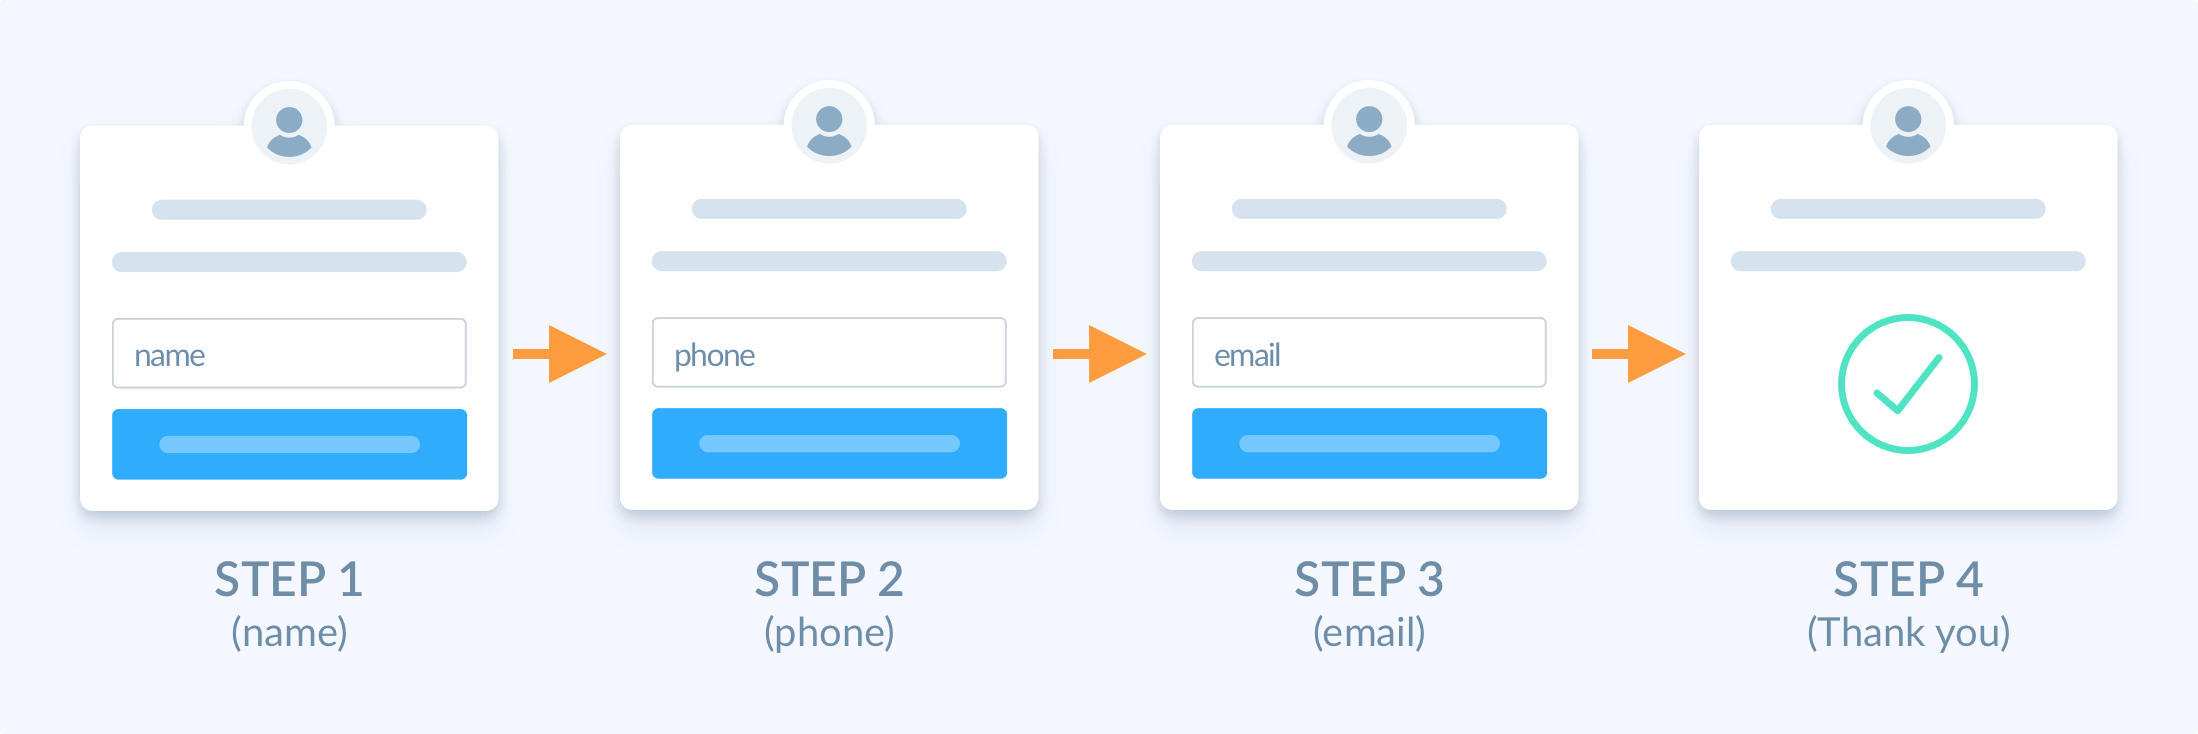
Here’s a basic example of how you might use a multiple-step form. In the example below, we are collecting the visitors Name, Phone and email across 3 separate steps.

To connect the forms simply set the form action on your first step to open the second step, then set your form on the second step to open the third step and so on.
This will progress the visitor through each step and each form in your ConvertBox funnel.
How to set integrations on multiple-step forms
When setting your form integrations it’s important to understand how ConvertBox, queues and submits fields across multiple steps.
Remember this important rule..
If your form has no integrations set then all field values will be queued to send when the visitor submits the next form with integrations.
So keeping the above rule in mind..
When creating a multiple-step form it’s recommended to set your form integrations on the last step with a form. This way the fields and values from each previous step will be queued and submitted all together on the final step.
Using our simple example again above with 3 steps – In this case, we would set our integrations on step 3. This means fields from step 1 and step 2 would be queued and sent all together on step 3 with the automation.
How to progressively update contact information on each step
In some cases rather than submitting all fields on the last step, you may want to collect the visitors email first and then update the contacts record with additional fields each time they submit a form throughout your ConvertBox steps.
Doing this allows you to collect the email immediately and still follow up if the lead abandons your funnel partway through.
In order to progressively update your contacts information, you will need to have an email field on every form (don’t worry it can be hidden after the first step).
On your first form set an integration to add the lead to a list/tag in your ESP, this will make sure the contact is added immediately after they submit the first form.
Then set another automation (it can be the exact same automation) on each of your following forms. When the visitor submits each form with an automation ConvertBox will check if the contact already exists and if they do update the contact with additional fields collected on that form.
To avoid showing the email field after the first step turn on the option “Hide fields when pre-filled” located on the sidebar for the form options (see the next section for details).
How to hide pre-filled fields if they are already known
If your visitors email address (or any other fields) is already known either because it was passed in the query string or because they submitted it in a ConvertBox form previously then the email field will be pre-filled automatically.
However, to help improve conversions you may not want to show the email address again when showing another form to collect additional contact information from your visitor.
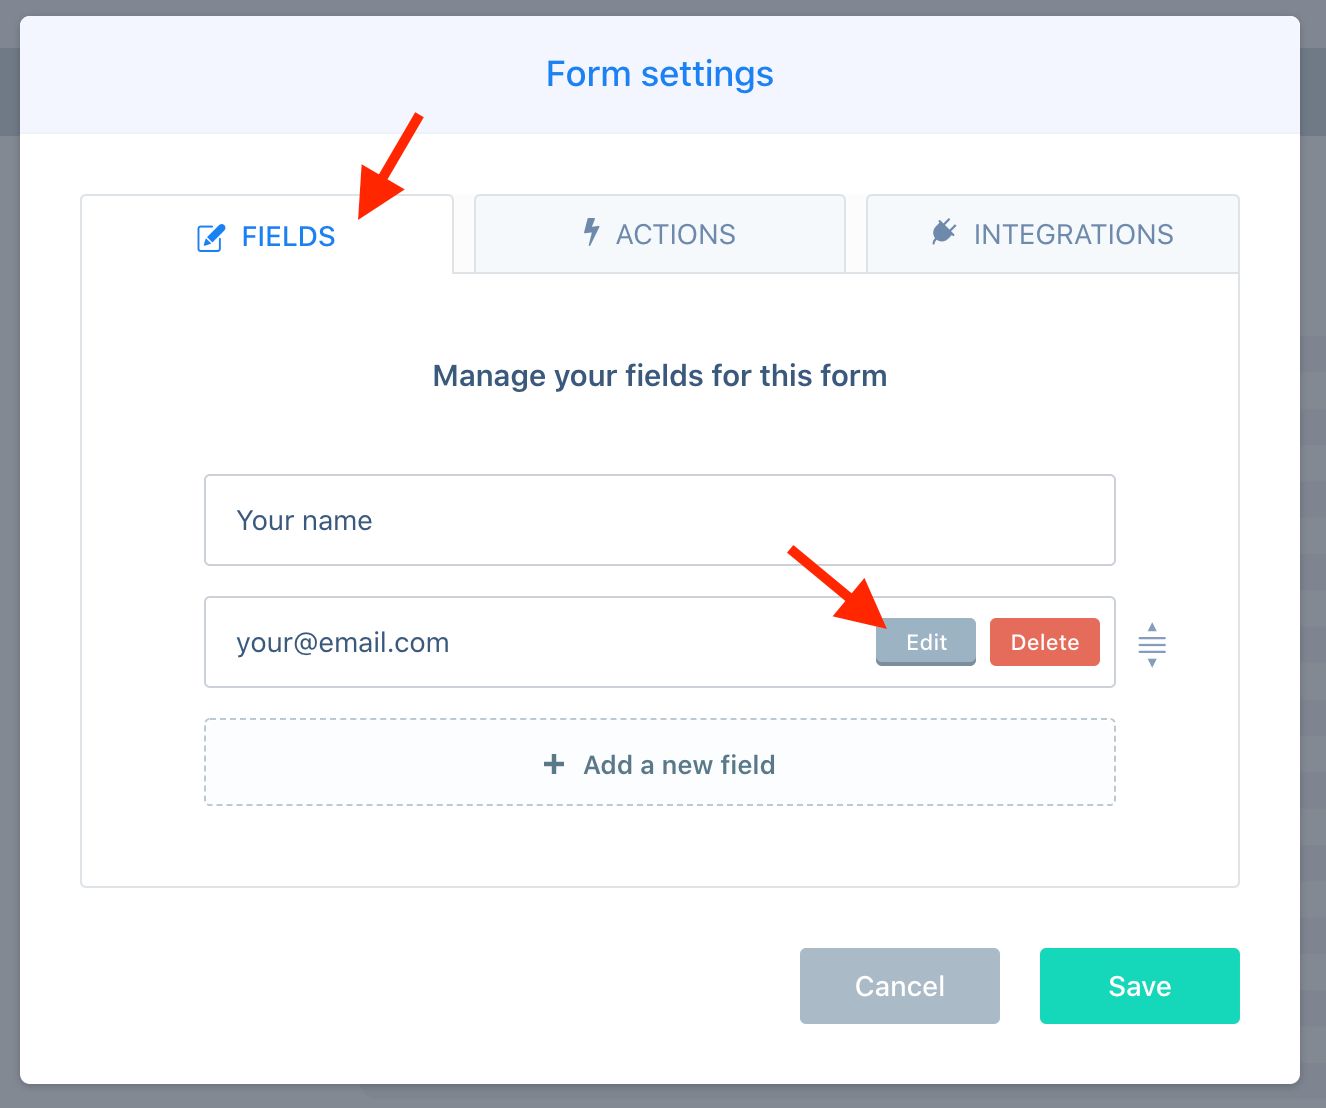
To prevent the email field (or any other fields) from showing if it is pre-filled simply edit the field in the Form settings modal.

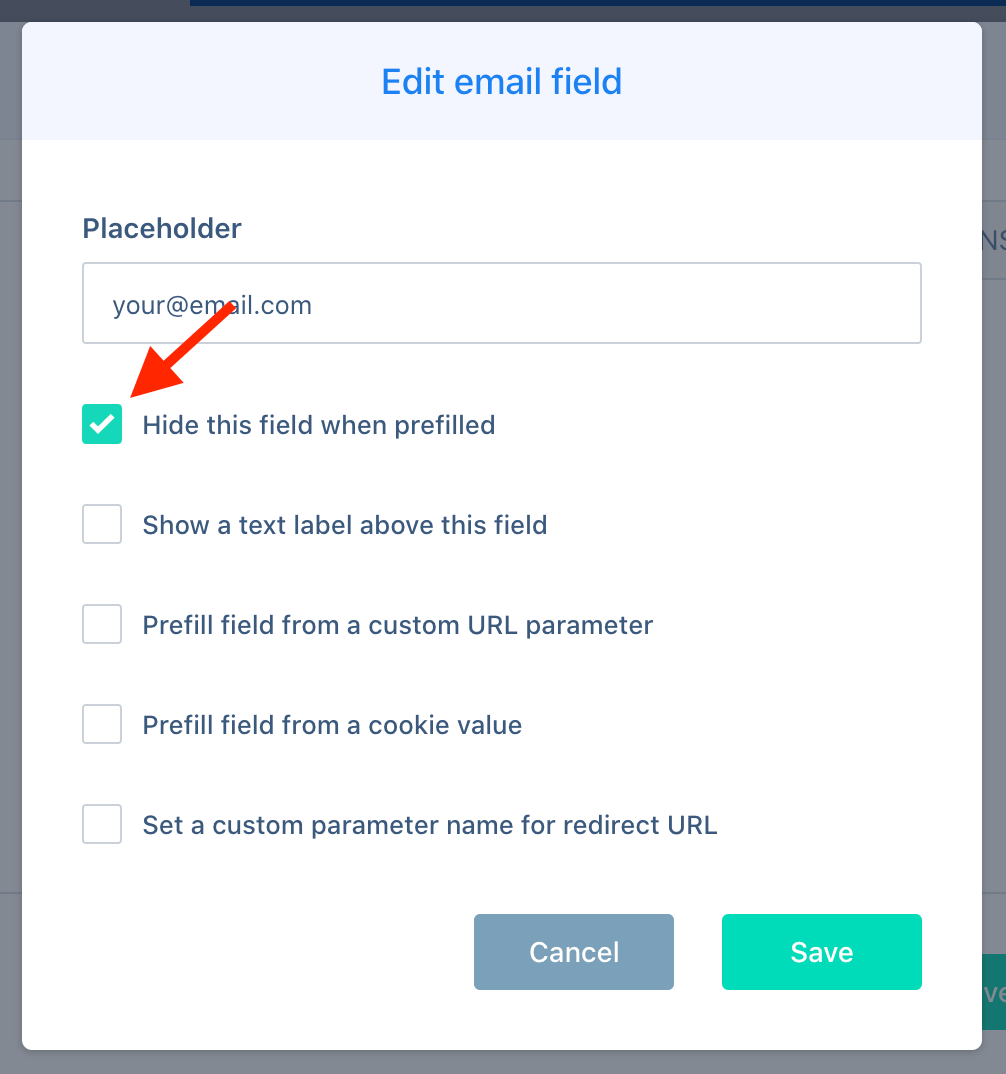
Then in the field setting select the option to “Hide fields when pre-filled” located on the sidebar for the form options.

When this open is selected, if the visitors email is already known the field will be pre-filled and hidden allowing you to still collect additional details for the contact without asking for their email again.
If for any reason the visitors email is not known then the email field will show allowing the visitor to submit their email and progress through the form as usual.
